Sunday, October 20, 2013

Lemon Cream Shrimp Orzo

What a nice fresh pasta dish!  Although there is cream in it, the freshness from the lemon just lightens it all up. Most recipes for this particular dish use angel hair aka capellini pasta which is also wonderful.  I had orzo on hand so that's what I used. I think orzo is great for this because the result is very risotto-like.

Now I wish I had measured out the amount of lemon juice I got from my lemon.  What I suggest you do is add half the juice to the sauce and taste it at that point.  Add a little more at a time until it hits the right citrus note to your palette. You can also add half the juice and after you've mixed the sauce into the orzo, you can taste if more lemon is needed at that point.

This dish is super easy and super fast to make - 15 minutes, guaranteed.  A terrific after work meal or simply because you want to limit the slaving in the kitchen without sacrificing the delivery of a satisfying meal!

This will serve 2 - well!

Here's what you'll need:
                        300 gms (about 10.5 oz) shrimp, shelled
                        1 C orzo
                        Juice of 1 small lemon
                        1/2 t lemon peel, grated or zested*
                        1 T butter
                        1/2 t each granulated garlic, dried basil, 
                        dried parsley
                        1/2 C heavy cream 
                        3/4 C Parmesan cheese (plus more to top, if desired)

                       *Tip: Grate or zest lemon before juicing! 
Bring water in pot to a boil.  Reduce heat.  
Pour orzo in and cook for about 8 minutes.  
About 2 minutes before orzo is done, 
melt the butter in a pan on medium heat.  
Add lemon zest, garlic, basil, parsley...
...lemon juice and cream.  
Add shrimp.  If  using uncooked, heat until they turn pink.  
If using cooked, cook about a minute until heated through.
While shrimp cook, drain the orzo.  Return to pot.
Pour sauce over orzo.  
Add Parmesan and a few grindings of fresh ground pepper.
Mix through.
Taste for salt to your liking.
Serve it up with extra Parm sprinkled on top.

 Tender shrimp in a lemony, creamy sauce,
held together by the magic of Parmesan!
How do you say "Yum" in Italian? 
(Well... according to Babelfish translation, it's actually "yum"!  LOL)


Thursday, October 17, 2013

Spicy Curried Pumpkin Coconut Soup for the Brain Dead

A few days ago, I made a pumpkin loaf with maple cream cheese frosting (recipe here).  I had some pumpkin puree leftover and decided to make this yummy soup that is stupid easy! 

With 3 tablespoons of red curry paste, it does have some bite.  But don't worry, your mucous membranes will remain in tact.  If you're worried about heat, start with 1 tablespoon at a time and work up to 3. Personally, I think the soup needs the full 3.

This is a great starter for a Thai dinner.  Or, you can make this into a substantial meal on its own by adding thin slices of chicken, shrimp, julienne red pepper and thinly sliced mushrooms.  Top with chopped cilantro.

Basically, you dump everything into a pot, whisk and heat.  Duh... is that easy, or what? You're an instant (but brain dead), Thai chef!

Here's what you'll need: 
                            1.5 C pumpkin puree
                            1 - 400 ml can coconut milk
                            3 T Thai red curry paste
                            1 chicken or vegetable bouillon cube*(not shown)
                            1 T fresh lemon juice (not shown)
                                      *(the kind that needs to be diluted with 2 C water - 
                                       but don't use 2 C to dilute!)
 
In a pot, add the pumpkin, coconut milk, red curry paste, bouillon cube, one cup of water and lemon juice.
 
Whisk together.
Heat to soup eating temperature.
Check for salt to your taste.
 
Serve it up!
There's always a little coconut milk residue left in the can.
Drizzle on top as decoration.
Or, use chopped cilantro if you have some on hand.

There you have it!
Zingy pumpkin coconut soup - Thai style!
Too easy not to make :-)


Tuesday, October 15, 2013

Pumpkin Loaf with Maple Cream Cheese Frosting.

Today was Canadian Thanksgiving.  Although it's too late to make it as a finish for your (Canadian) turkey dinner, it is still pumpkin season and after all, Hallowe'en is around the corner so you can certainly make it for that! If you happen to be American, well consider this as an ample heads up to make for your festive celebration!

Don't be daunted by the ingredients in the picture.  I do that for presentation purposes. As you measure things out, simply dump into the appropriate bowl. You can wait to make the frosting when the cake is completely cooled.  

I had a large can of pumpkin which, after I measured out what I needed for my cake, had 1 1/2 cups leftover. Stay tuned for my coconut pumpkin soup recipe which I will make with the remaining amount in the next day or so. (Soup recipe here)

I made this last night to take to my sister's for Thanksgiving dinner today.  It was a hit! What's not to love?  Dense layers of sweet pumpkin alternating with a thick layer of maple flavoured cream cheese frosting. Oh, yes!

Here's what you'll need:
                  Loaf:
                      In large bowl:
                           2 C pumpkin puree (I used canned, unsweetened)
                           1 egg
                           1/3 C veg oil
                           1/4 C water
                           1 C sugar
                      In small bowl:
                           1 1/4 C flour
                           1 t baking soda
                           1/2 t salt
                           1/4 t EACH ground cinnamon 
                           and ground nutmeg
                           1/8 t EACH ground cloves and ground ginger
                           Preheat oven to 350 degrees F

                     Icing:
                          2 - 8 oz package cream cheese, softened
                          1/2 C butter, softened
                          1/4 C maple syrup
                          1/4 C brown sugar (not shown - an afterthought!)
                          1 t vanilla extract.
Place ingredients in large bowl as above.
Place ingredients in smaller bowl as above.
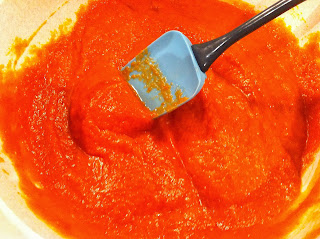
Mix large bowl ingredients.
It should look like this.  Orange or what?!
Mix small bowl ingredients.
It should look like this.
Now pour the flour mixture into the pumpkin blend.
Combine completely until you get this.
Spray a standard loaf pan with non-stick spray.
Pour pumpkin batter into pan.
Make sure you level off and push into four corners.
Bake for about 50 to 60 minutes until 
centre comes out clean with a toothpick.
This is what it looks like out of the oven.
It will fall.  This is a low cake.
Let cool completely before icing.

Icing Prep:
Place everything on the icing list into a mixing bowl.
You don't see the brown sugar here.
I added it later after a taste test - needed more sweetness!
With hand or stand mixer, mix until completely blended.

How to ice/assemble your cake:
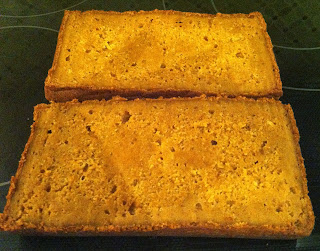
Here is the cooled cake.
Note how I luckily have some natural notches as guidelines!
I'm going to cut it into 3 pieces horizontally.
With a long serrated knife, using a sawing motion, 
cut across the top third of your cake.
The right tool for the right job makes all the difference!
Here is the top piece off!
Now do it again!
Here you have roughly 3 equal pieces.
 
 On the bottom piece, spread about 1/3rd of the frosting.
Put it on your serving dish first!  
I didn't and had to lift it onto the plate later - dumb!
 Put the middle layer on top...
Add another 1/3rd of the frosting.
I use an offset spatula for spreading.
 
Gently put the top layer on.
Spread on remaining frosting.
The frosting recipe makes a lot.  You may want to use less.
If you have leftover, use to top some banana muffins - yum!  
Now pop it in the fridge to set.

When you cut it, use a serrated knife.
Wipe after each cut if needed.
Pre-cut from fridge and place onto serving plates.
Let it warm up a bit to room temp.
And here is what it looks like cut.
It's what we got to enjoy for dessert today.
Dense pumpkin cake,
thickly layered with maple cream cheese frosting.
Sooooo divine!
You and your guests will gobble it right up!


Thursday, October 10, 2013

Stupid Easy 3 Ingredient Raspberry Lemon Mousse for the Brain Dead

 I may be brain dead tonight but as it turned out, so was my cell phone!  After a long day at work, grocery shopping, making dinner for me and hubby, it was off to the Mac Genius Bar to see if the old girl could be resuscitated (uh... the phone, not me!).  The bad news is, my phone is truly brain dead, gone, buh-bye. A perfect event for a Brain Dead Thursday, I suppose.  

Now the good news... I had just enough energy to whip up this tart silky mousse with little bursts of "rasbellies" buried within its creamy concoction. This is a perfect end to a more substantial meal like pasta. Float away into citrusy bliss with this oh so stupid easy but yummilicious Raspberry Lemon Mousse!

Here's what you'll need:
                            1 L container Cool Whip 
                            500 ml jar prepared lemon curd
                            6 oz package fresh raspberries
                            Lemon curls for garnishing (optional) 
                            Makes 4 large portions or 8 - 4 oz portions
Set aside 4 T Cool Whip and 4 perfect plump berries.
If making 8 servings, double the amounts.
This is for garnishing later.
 
Place Cool Whip in a medium sized bowl.

Add the lemon curd.
Now you will fold it in.
Here's how you fold:
 With your spatula on the side,
run it down the middle making sure 
it touches the bottom of the bowl.
Give the bowl a 1/4 turn to the left...


With the with the broad side of the spatula, 
lift up the contents and flip over.
Repeat until everything is well incorporated like below.
Still don't know how to fold?  Watch here.
 Almost there!  More folding needed!
Fully folded is when whip and lemon are at one.
Notice the pale consistent yellow throughout. 
Next, add the raspberries.
I just tore them into smaller pieces by hand. 
Now gently fold in raspberries until well incorporated.
If using, make a few lemon curls using a zester.
This is a pretty finish for your presentation.
Pour evenly into 4 serving bowls.
I used these cocktail glasses for a pretty presentation.
Place a dollop of the reserved Cool Whip on each mousse.
Top with a picture perfect raspberry and sprinkle with curls.
 
Looking good, no?
If you want to amp it up, drizzle with some Chambord,
a French raspberry liqueur.
Did I say this was stupid easy?  Yes?  
Well I simply had to say it again!  Cause now you know it!
What a nice light lemony dessert!
Perfect dreamy end for any brunch, dinner or just anytime.


Tuesday, October 8, 2013

OMG Fudge Brownies - Best Ever!

Oh, sweet chocolate.  Thine velvety love wraps around my taste buds imprisoning me to your decadence, enslaving me to your every whimsy.

Chocolate is truly poetry for the mouth.  It can be crafted into so many forms, each rivaling the other for gustatory superiority.

When you want a rich, decadent uber chocolate experience, look no further than the fudge brownie. This moist, deeply cocoa flavoured indulgence is the ultimate hit of chocolate.  Not a fancy cake or confection, just rich, deep chocolate.  And chocolate that echoes chocolate!

I dare you to make this and have a single bite without swooning.  You may be tempted to hide them for your own personal indulgent treat.  Or, if you're feeling generous, make them for a girls' night yak fest - but with mouths full of brownie, you may not get to the talking part!

Enough anticipation and denial...

And by the way, my sincere apologies because I'm about to make you an addict for which there will be no cure!

Here's what you'll need:
 
                              2/3 C butter ( I used salted)
                              1 1/4 C sugar
                              1 C dark unsweetened cocoa powder
                              1/2 C flour
                              1 C semisweet dark chocolate chips, divided
                              1 t vanilla
                              1/4 t salt
                              2 eggs
                              Oven 325 degrees
Place butter, sugar, cocoa and salt in a large bowl.
Microwave together at 30 second intervals on high. 
Two or 3 rounds ought to do it depending on your oven.  
Mix after each 30 seconds.  
It will look shiny and grainy like this.
Add one egg and half the flour.  Mix well.

Add remaining egg and flour.  Mix well.
Add the vanilla and stir through.  
Look at those beautiful specks found only in real vanilla!
Fold in 3/4 C of the chips.  Keep 1/4 cup to sprinkle on top.
It should look thick and shiny like this.
Spray an 8" x 8" square pan with non-stick spray.  
Pour batter in. 
Spread to corners of pan with a spatula and level off.
Sprinkle with remaining 1/4 C of chocolate chips.

Now bake for 25 minutes.

Check centre with a toothpick at 25 minutes. 
Crumb-like specks should stick to it. 
If it looks wet, put in for a few more minutes. 
Do not over bake.  It's better to under bake.  
Cooking time should be no more than 30 minutes.
Fresh out of the oven...
Melted chocolate gooeyness on top!
Try to let it cool - if you can!
And here's what you get!
Fudgey...
Chocolatey...
To die for...
Best. Brownie.  Recipe.  EVER!